|


GTIN
Colloquially, many know GTIN as a barcode, but technically, GTIN is the number found beneath the barcode symbol itself, and can therefore also be used for other technologies such as 2D barcodes and RFID tags.
Colloquially, many know GTIN as a barcode, but technically, GTIN is the number found beneath the barcode symbol itself, and can therefore also be used for other technologies such as 2D barcodes and RFID tags.
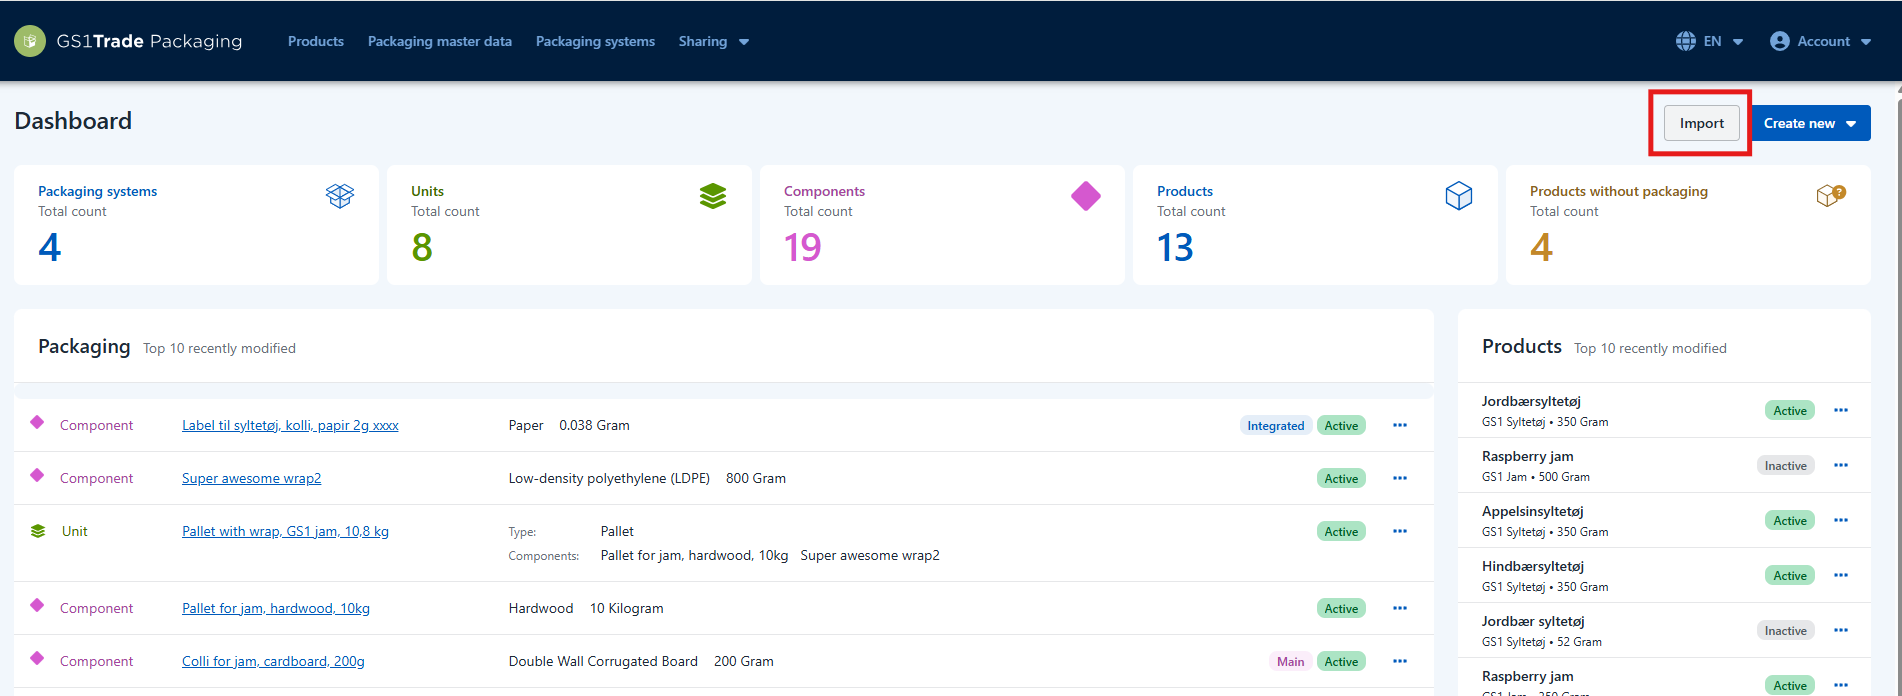
The import template can help you get your basic data created, but there is still a few things that need to be done in GS1Trade Packaging to complete data creation
The Excel import template allows you to import your product and packaging master data into GS1Trade Packaging. In other words, you can use the import template to upload data about products, packaging components, and packaging units, as well as linking components, units, and products together.
You do not need to fill out the entire template. You can chose to import product data or packaging components only. Likewise, it is not required to link components, units, and products in order to import the file – this can also be done later directly in Trade Packaging.
Please note: The data import file can contain a maximum of 200 rows per tab – e.g. 200 products, 200 units, and 200 components. If you need to import more, download a new file and continue your work there.
After importing your basic data, you will need to complete the following tasks in GS1Trade Packaging:
Do you have many products?
We generally recommend asking your suppliers to help upload the data. The most efficient approach is for suppliers to register directly in GS1Trade Packaging and share data with their customers in the system. This saves time for both suppliers and customers – while also ensuring higher data quality.
The import template must be downloaded directly from GS1Trade Packaging. Each template contains a unique ID, which is why it is important that you always download templates from your own workspace.
It is important to use a unique template each time you create data, as the data will be overwritten if you import the same file with the same ID more than once.

If you want to use the import template to collect data from your suppliers, you can choose to download several files at once. In that case, it is crucial that each supplier receives their own unique import template to prevent data from being overwritten.
In the following example, we will focus on downloading a single template for your own use.
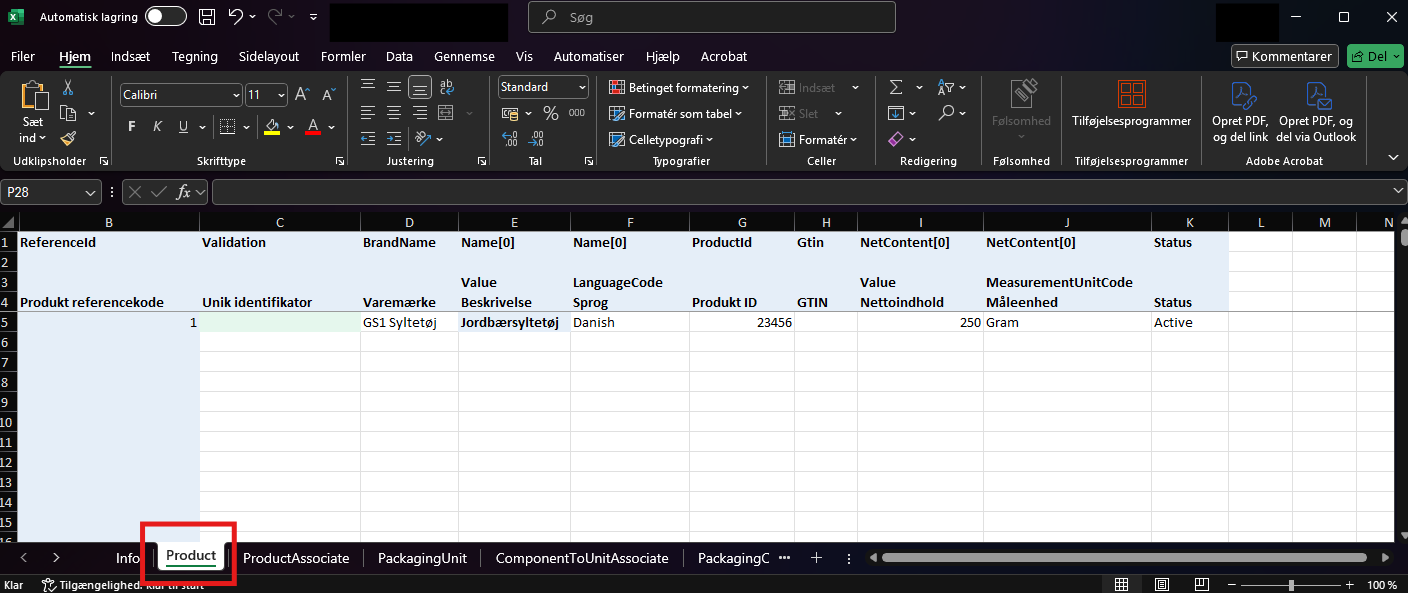
In the Excel-file go to the Product tab.
Fill in the required fields; Brand name, Product name, Language, Product ID, GTIN (optional), Net content, Unit of measurement, Status. Net content can be entered as whole numbers or decimals, but not as a range.
Specify a Product reference identifier for each product. This must be a number between 1–1000. We recommend numbering them sequentially.
Please note: Each reference identifier must be unique and can only be used once in the template. If you use the same number more than once, Column C will turn red to indicate a duplicate.
Go to the PackagingUnit tab. Fill in the following fields: Name, Type, and Status.
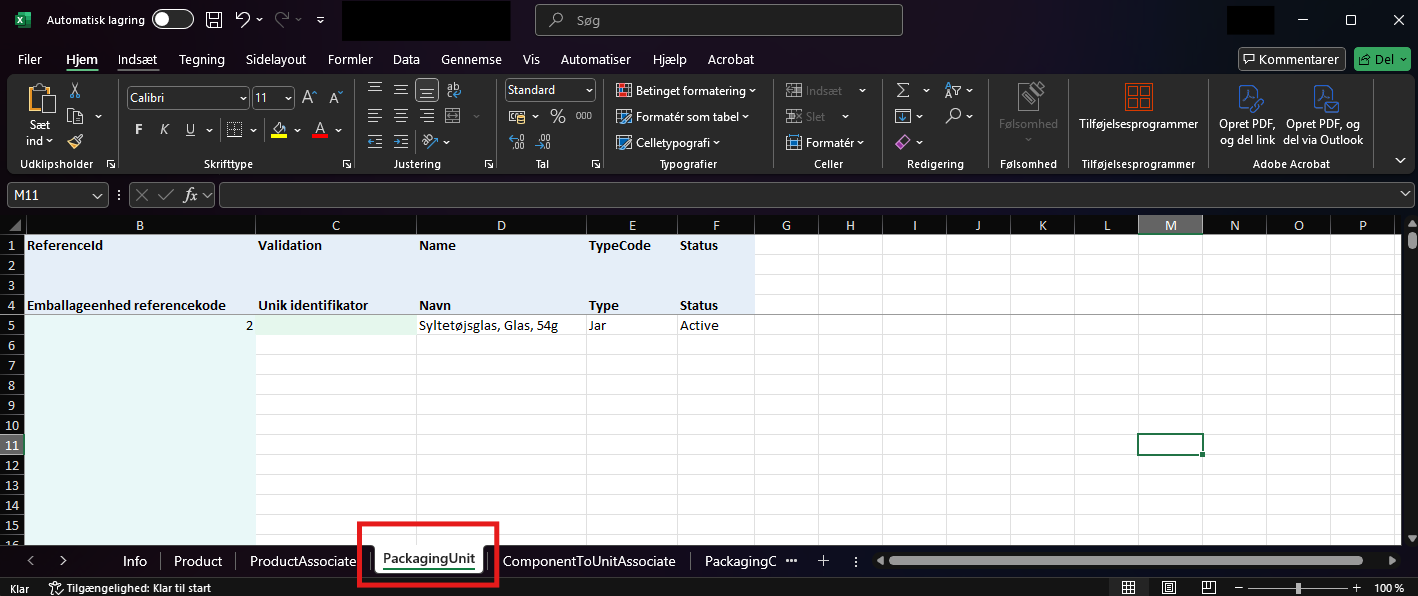
Specify a Packaging unit reference identifier for each packaging unit. This must be a number between 1–1000. You cannot reuse the numbers you used in Step 2.
Please note: Each reference identifier must be unique and can only be used once in the template. If you use the same number more than once, Column C will turn red to indicate a duplicate.
Go to the PackagingComponent tab. The following fields are mandatory: Name, Element type, Type, Weight, Unit of measurement, and Status (far right, Column AA). Weight can be entered as whole numbers or decimals, but not as a range.
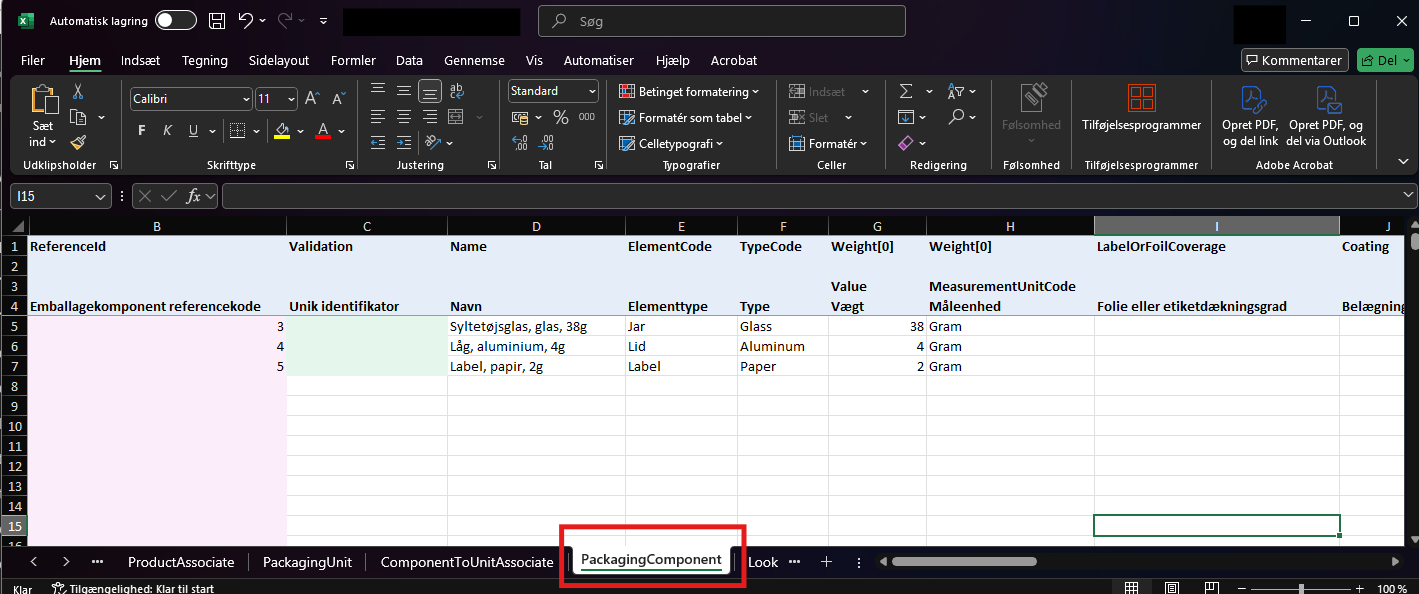
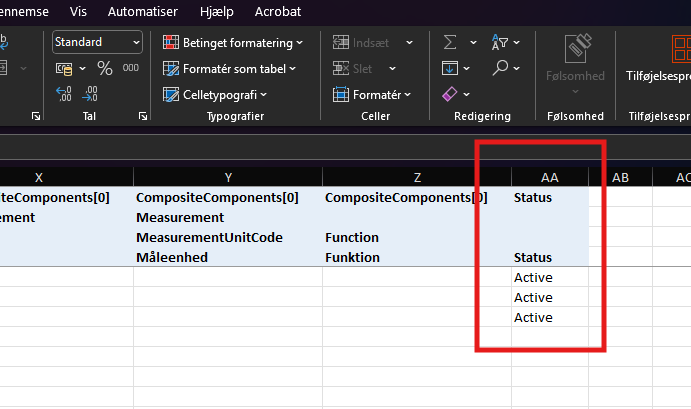
In addition you may fill in technical attributes in Columns I–Z. These are optional and not required to import the template.
Specify a Packaging component reference identifier for each component. This must be a number between 1–1000. We recommend numbering them sequentially.
Please note: Each reference identifier must be unique and can only be used once in the template. If you use the same number more than once, Column C will turn red to indicate a duplicate.
Now that products, packaging components, and packaging units have been created, you can choose to link components to units and units to products.
Please note: Linking is not required in the template for the file to be imported. In many cases, it may be easier to link the units afterwards directly in GS1Trade Packaging.
If you choose to link in GS1Trade Packaging, we recommend using clear naming conventions so you can easily distinguish the components – e.g. “Component for Product A”.
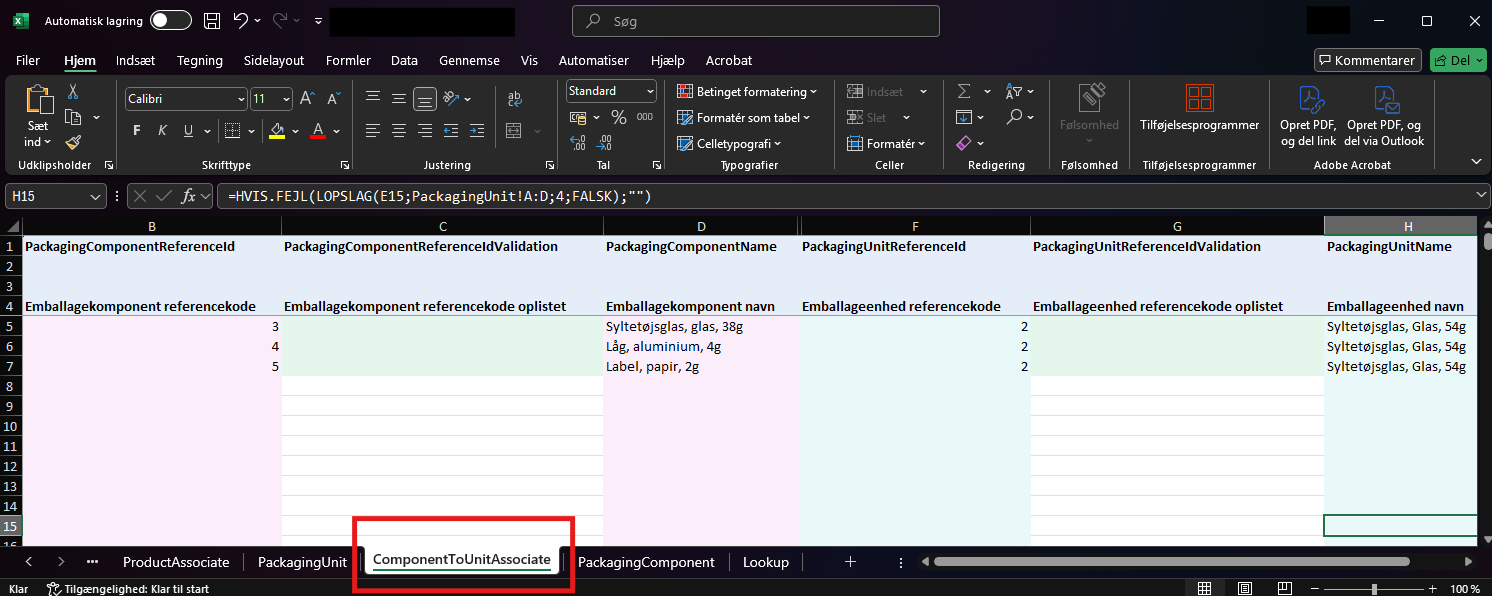
Go to the ComponentToUnitAssociate tab:
Now the packaging components are linked to the packaging unit. The next step is to link the packaging unit to the product.
Please note: The same component can be linked to multiple units.
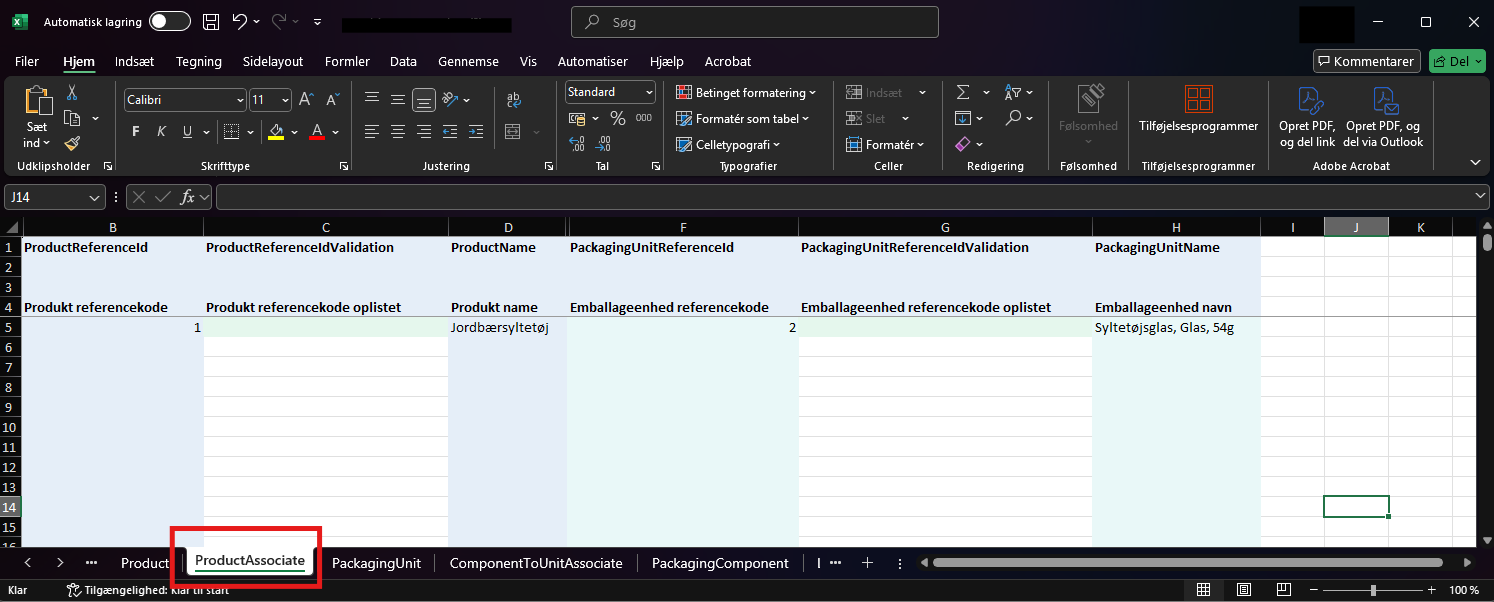
Go to the ProductAssociate tab:
Now the packaging unit is linked to the product.
Please note: The same packaging unit can be linked to multiple products if it is used across different products.
When you are finished, save the file on your computer.
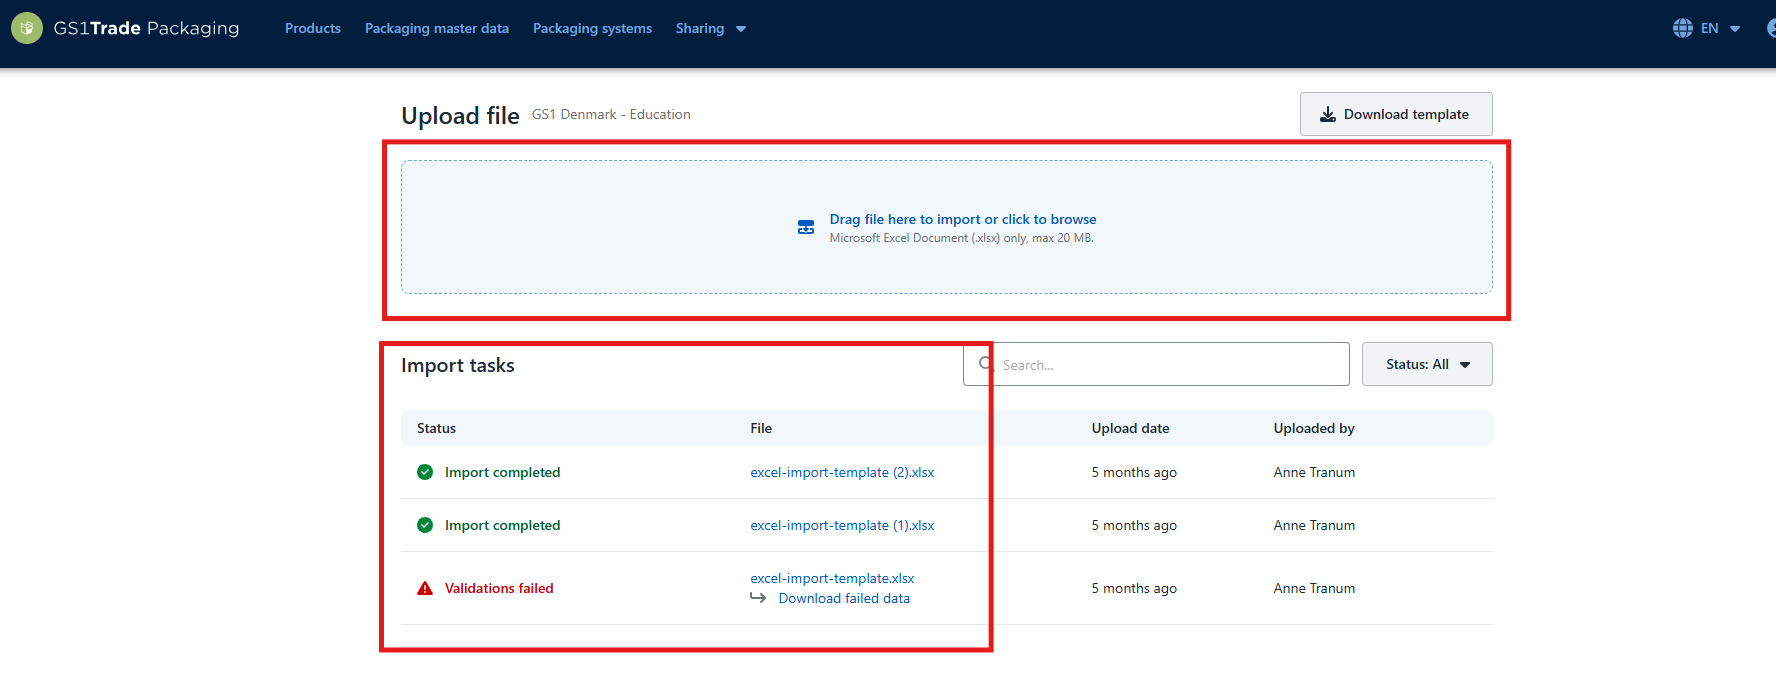
If the import fails, the status will show an error message and an Excel file will be generated with a summary of the errors. In the section below you can see an overview of the most common errors.
Do you still need help? Reach out to our support team. We are always ready to help.